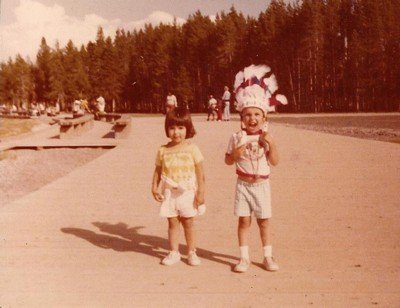
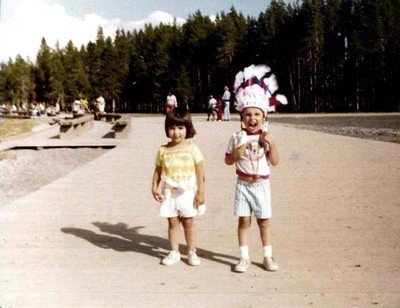
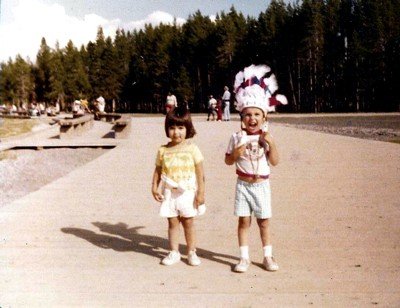
This weekend I was going over some old photos, and found one that I love of my sister and I. It was taken around 1979 on a family trip to Yellowstone National Park. In the photo my sister and I are standing side by side, while I’m wearing a Native American headdress and apparently doing my best war call. The photo is great, except for one thing; it’s completely discolored from years of exposure.
I realized that I know how to fix this, and it’s a quite simple fix at that. I wanted to take a moment to share the technique with you. It will take a little practice, but once you get it down, you’ll see how easy it is to color correct your own photos.
- First step, fire up Photoshop if it’s not already up and open the photo you want to correct. The photo I’m using is below:
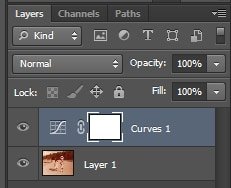
- Next go to Layer -> New Adjustment Layer -> Curves
You should see a new layer open over the top of your photo labeled “Curves 1”.
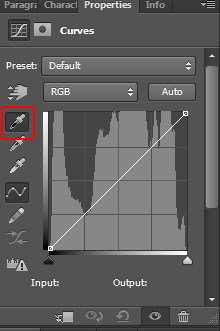
- Ensuring that you are on the curves layer, look to the properties panel above your layers panel and select the black point dropper. Now this part takes a bit of practice, but over time you’ll learn to perfect it. You want to look for the place in the photo that is going to be the blackest bit of your photo.
- If you can’t figure it out, it may help to add another adjustment layer; Layer->New Adjustment Layer -> Threshold.
- Slide the threshold level to the right till there is hardly any white left and select a point from here.
- Hide the threshold layer and see how your photo looks, you may need to do this a few times.
For this photo, I know that my sister has naturally black hair, so I’m going to select the top of her head, another good black point would be the shadow under the little bridge behind us. After selecting the top of her head, the photo is already looking much better, but we still have some work to do.
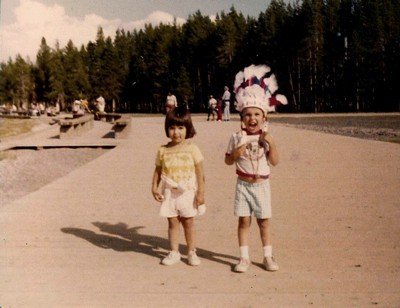
- Next we want to select the white point dropper from the properties panel. Using the same method as above, we want to select the whitest point in our photo with the dropper. If you need a little help, again turn on your threshold layer and move the threshold slider to the left to reveal the whitest points in the photo. With the shadows in the photo, we can see that the sun is coming from the right side of the photo (our left), so if we look at my sister’s shoes or my socks, we can see those would be a good white point. I’ve selected the second feather from the right side of my head for this portion of the tutorial. Let’s see how the photo looks now:
- Now we want to neutralize the color, so we need to select the gray point dropper. Remember that concrete is NOT GRAY. For this I’m going to select the shadow in a crease on the front of my pants. After this, voila — we have a beautiful, color corrected photo.
Very good tutorial. thanks for sharing.